How To Clean Dust From Your PC

Dust is one of the most common and overlooked threats to a computer’s performance. Over time, airborne particles settle inside the case, coating fans, heat sinks, and vents. This buildup restricts airflow, traps heat, and forces cooling systems to work harder than they should. The result is higher operating temperatures, louder fans, and in extreme cases, hardware instability or premature component failure.
Regular cleaning not only restores cooling efficiency but also prolongs the lifespan of your components. A system that runs cooler experiences less thermal stress, which means CPUs, GPUs, and power supplies last longer. Even modest dust removal can make a noticeable difference in both noise levels and performance.
Understanding where dust collects
Dust doesn’t spread evenly inside a PC — it follows airflow. Fans are both the entry and exit points for particles, which means they and their surrounding areas collect the most buildup.
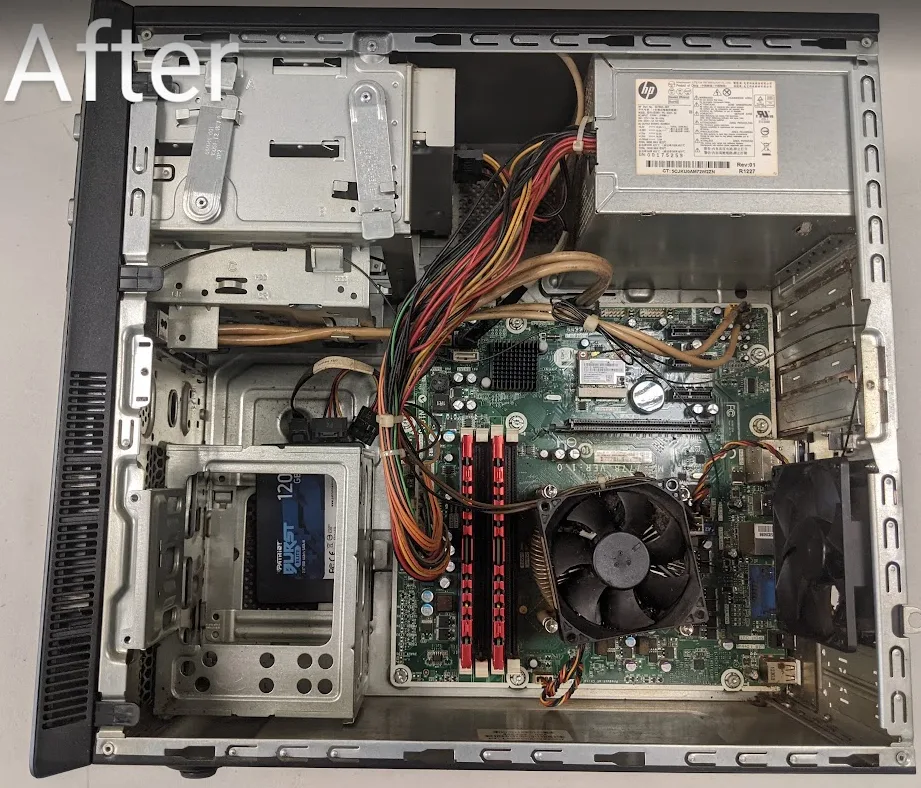
The CPU and GPU fans are prime hotspots. As they draw air across their heat sinks, fine dust settles between the fins, insulating them and reducing cooling efficiency. Over time, this layer acts like a blanket, trapping heat where it needs to be dissipated most.
Case fans and intake vents also gather dust quickly. Intake fans in particular pull in unfiltered room air, and without dust filters, the particles accumulate along blades and grills. Exhaust fans pick up what’s left, creating visible dust mats that restrict airflow.
The power supply unit (PSU) has its own fan, often mounted at the bottom or rear of the case. Because it draws air across internal components, it can collect heavy layers of dust that, if left unchecked, shorten its lifespan.
Even components outside the main case aren’t immune. Keyboards, mice, and monitors with vent openings also attract dust, though buildup there is more about user comfort and cleanliness than cooling.
Understanding where dust tends to settle makes cleaning more efficient: focus first on the parts that move air (fans and vents), then address secondary areas like heat sinks and filters.
Tools and safety precautions
Before opening up your computer, it’s important to gather the right tools and understand how to handle components safely. The goal is to remove dust without damaging sensitive electronics.
The most useful tool is a can of compressed air, which blasts dust out of tight spaces without direct contact. Pair this with an anti-static brush for gently loosening buildup on fans and heat sinks. A microfiber cloth works well for wiping exterior panels, while isopropyl alcohol (90% or higher) can clean sticky residue or stubborn grime if needed.
Equally important is what not to use. Household vacuum cleaners generate static electricity and can damage components. Moist cleaning supplies should be avoided inside the case, as even a trace of liquid can short-circuit a board.
Take safety precautions seriously: always power off and unplug your PC before opening it. Press the power button once while unplugged to discharge residual electricity. If available, use an anti-static wrist strap or ground yourself by touching a metal surface before handling components. Avoid working on carpeted floors, since they’re prone to static buildup.
Step-by-step cleaning
- Shut down and unplug. Power down the computer completely, disconnect the power cord, and unplug all peripherals. Move the system to a well-lit, ventilated area — ideally outdoors or on a table that can be cleaned easily.
- Open the case. Remove the side panel to access the interior. If your case has dust filters at the front, bottom, or top, take those out as well.
- Blow out loose dust. Use compressed air to clear dust from fans, heat sinks, and corners. Hold each fan blade still with a finger or pen while blowing air, to prevent overspinning and damaging the bearings. Short, controlled bursts are better than continuous sprays.
- Clean fans and heat sinks. If buildup is stubborn, loosen it gently with an anti-static brush before blasting it out with air. For heat sinks, angle the airflow through the fins to dislodge compacted dust.
- Wipe down surfaces. Use a microfiber cloth to remove dust from flat surfaces, cables, and the inside of the case. If you notice sticky residue, apply a little isopropyl alcohol to the cloth, never directly to components.
- Clean dust filters and vents. Rinse removable filters with water, let them dry completely, then reinstall. For non-removable filters or grills, use compressed air or a brush.
- Reassemble and test. Once everything is dust-free, reattach the case panels, reconnect cables, and power the PC back on. You should notice quieter fans and lower operating temperatures immediately.
Preventing dust buildup
Once your PC is clean, the next step is keeping it that way for as long as possible. Dust will always accumulate, but smart setup and maintenance can slow it down. The most effective measure is to use dust filters on intake fans. Many modern cases come with them built in, but if yours doesn’t, aftermarket magnetic filters are easy to add. These filters catch particles before they reach sensitive components and can be removed and rinsed regularly.
Placement matters too. PCs sitting directly on carpet or near heating/cooling vents pull in more debris. Positioning the case on a desk, or at least a few inches off the floor, reduces intake of dust. Avoid placing the system in enclosed spaces like cabinets, where airflow is restricted and dust circulates more.
Finally, make cleaning part of your routine. A light dusting every two to three months — more often if you live in a dusty environment or have pets — keeps buildup manageable. Quick blasts of compressed air through vents and filters are usually enough to prevent larger cleanings down the line.