
How To Replace Thermal Paste
Thermal paste, also known as thermal compound or thermal grease, is a critical but often overlooked part of a PC’s cooling system. It’s applied between the processor (CPU) or graphics chip (GPU) and the cooler to ensure efficient heat transfer. Without it, microscopic gaps between the chip and heatsink trap air, which is a poor conductor of heat. Over time, thermal paste can dry out, lose effectiveness, or simply degrade, leading to higher temperatures, louder fan speeds, and in some cases even system instability.
Replacing thermal paste is a straightforward process that can restore optimal cooling and extend the life of your hardware. It’s a maintenance task most PC owners will only need to do every few years, but knowing when and how to do it is essential for keeping your system healthy.
Signs thermal paste needs replacement
One of the most obvious signs is rising CPU or GPU temperatures. If your system runs noticeably hotter than when it was new, and you’ve already cleaned dust from fans and heat sinks, old thermal paste may be the culprit. Temperatures creeping 10–20°C higher than normal under load are a common indicator.
Another clue is thermal throttling, when your CPU or GPU lowers its performance to reduce heat. You might notice sudden drops in frame rates during gaming, sluggish multitasking, or benchmarks scoring lower than expected.
If you’ve removed a cooler for any reason, like to upgrade parts, clean a heatsink, or troubleshoot, then the thermal paste should always be replaced. Once the bond between the heatsink and CPU is broken, the paste can’t be reused.
Finally, age alone is a factor. Most quality pastes last 3–5 years under normal use, but high-performance systems that run hot may need reapplication sooner. If you built or bought your PC several years ago and never replaced the paste, doing so can improve both temperatures and stability.
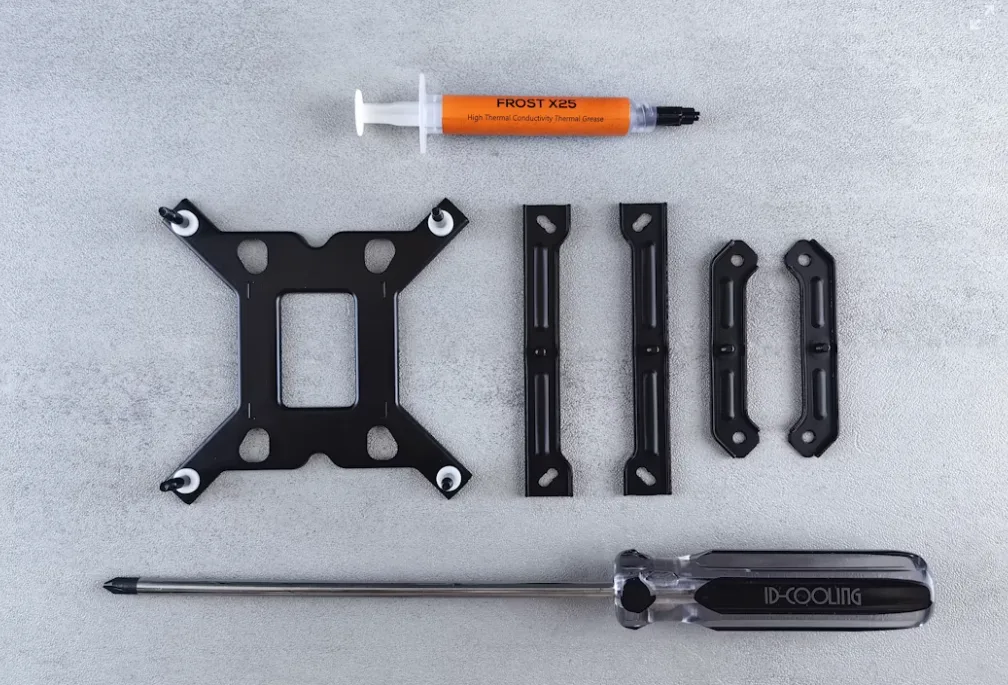
Tools and preparation
Before you begin, make sure you have the right materials and workspace. The most essential item is a fresh tube of thermal paste , Choose a reputable brand like Arctic MX-4, Noctua NT-H1, or Thermal Grizzly Kryonaut. These are non-conductive and easy to apply, making them safe for both beginners and advanced users.
You’ll also need isopropyl alcohol (90% or higher) and lint-free cloths or coffee filters to clean off old paste. Cotton swabs can help with precision, but avoid anything that sheds fibers. Some builders prefer pre-packaged cleaning pads made for electronics, which are convenient but optional.
For disassembly, have the right screwdriver for your CPU cooler or GPU heatsink. Many coolers use standard Phillips screws, while aftermarket models may include custom mounting hardware.
Finally, prep your workspace. Work on a clean, flat surface with good lighting. Unplug the PC, ground yourself against static, and if available, wear an anti-static wrist strap. Keeping your components and screws organized with a small tray or container goes a long way toward preventing lost parts.
Step-by-step replacement process
- Power down and disassemble. Shut off your PC, unplug it completely, and press the power button once to discharge residual power. Remove the side panel and locate the CPU cooler. If you’re reapplying paste to a GPU, you’ll need to remove the graphics card and its cooler, which may be more complex.
- Remove the cooler. Unscrew the heatsink or cooler evenly, loosening each screw a little at a time in a cross pattern to avoid uneven pressure. Carefully lift it away from the CPU. If it feels stuck, gently twist it side to side — don’t pull straight up, as this can rip the CPU out of its socket.
- Clean the old paste. Using a lint-free cloth or coffee filter dampened with isopropyl alcohol, wipe away the old thermal paste from both the CPU surface and the cooler’s contact plate. Repeat until both are clean and shiny, with no residue left behind.
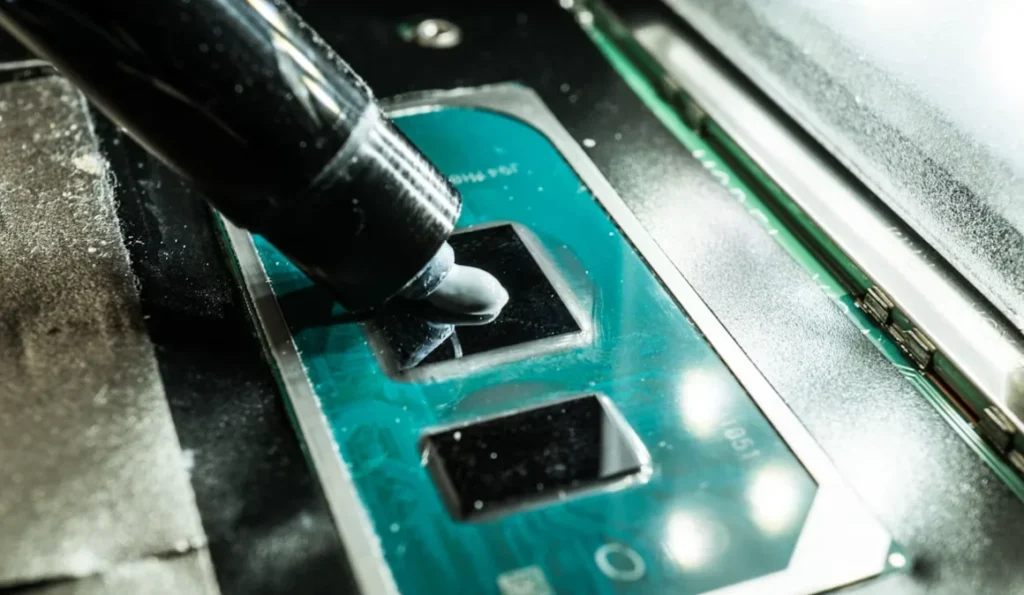
- Apply new paste. Place a pea-sized dot of thermal paste in the center of the CPU. This amount is usually enough to spread evenly when the cooler is reattached. Avoid spreading the paste manually — the pressure from the heatsink will distribute it. Applying too much can cause spillage, while too little won’t cover the surface adequately.
- Reattach the cooler. Carefully place the heatsink back onto the CPU, aligning it with the mounting holes. Tighten the screws evenly in a diagonal pattern to apply balanced pressure across the surface. For GPUs, reassemble the cooler carefully, reconnecting any fan cables before securing the shroud.
- Reconnect and test. Plug the system back in and boot into Windows. Use a monitoring tool like HWMonitor or CoreTemp to check CPU or GPU temperatures. You should see lower idle and load temps compared to before, confirming that the new paste is working properly.
Best practices and prevention tips
Replacing thermal paste isn’t something you need to do often, but a few habits will ensure you get the most out of each application. The most important tip is to avoid overhandling your cooler and CPU. Every time the cooler is removed, the paste must be replaced, so minimize unnecessary disassembly.
When choosing paste, stick to trusted brands and avoid liquid metal unless you’re an experienced builder. Liquid metal compounds conduct electricity and can permanently damage components if spilled. For nearly all systems, a high-quality non-conductive paste strikes the right balance of performance and safety.
Monitoring your system is also a form of prevention. Using tools like HWMonitor, CoreTemp, or MSI Afterburner lets you keep an eye on CPU and GPU temps over time. If you notice steady increases even after dust cleaning, that’s a signal your paste may be drying out.
Finally, store thermal paste properly. Keep the tube sealed and in a cool, dry place to prevent it from drying before its shelf life is up. A single tube can last through multiple reapplications if stored well.